topiary balls.
Can you guess what it is in this picture I made?... As if the title didn't give it away already... yep I made my own topiary ball. It was cheap, easy, and didn't take too long to make...
 You'll need some moss covered stones, styrofoam balls (both of these came from the dollar store), hot glue, and a knife. I painted one of the styrofoam balls first but since I had to carve into it it was kindof pointless in the end...
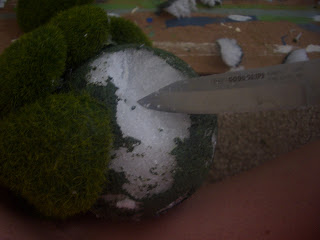
The bag of moss stones I found had 2 different sizes in them, some little ones and then some larger weird shaped ones... For the large ones to lie flat and keep the ball in a round shape, you will need to carve out areas to place the stone into...
 Put some hot glue on the stone (the perimeter of the bottom works the best) and place in the hole you carved... the smaller stones most likely will not have to have a hole carved out for them but as you place them you will be able to see whether or not you need to carve something...
 The end result... (this one was made with only small stones so no carving was needed)...
 Here is the one I was making above, with the larger and smaller stones together...
 Here's my inspiration photo and mine next to each other...


I'm happy with the result!... I think I used about 6-7 bags of the stones for both balls (there are only 5 stones in a bag). The first ball I showed was using a small styrofoam ball while the bottom one was with a larger styrofoam ball. (inspiration photo from lonny).
~Megan
Visit my sidebar to see what parties this will be linked to!
 You'll need some moss covered stones, styrofoam balls (both of these came from the dollar store), hot glue, and a knife. I painted one of the styrofoam balls first but since I had to carve into it it was kindof pointless in the end...
The bag of moss stones I found had 2 different sizes in them, some little ones and then some larger weird shaped ones... For the large ones to lie flat and keep the ball in a round shape, you will need to carve out areas to place the stone into...
 Put some hot glue on the stone (the perimeter of the bottom works the best) and place in the hole you carved... the smaller stones most likely will not have to have a hole carved out for them but as you place them you will be able to see whether or not you need to carve something...
 The end result... (this one was made with only small stones so no carving was needed)...
 Here is the one I was making above, with the larger and smaller stones together...
 Here's my inspiration photo and mine next to each other...

I'm happy with the result!... I think I used about 6-7 bags of the stones for both balls (there are only 5 stones in a bag). The first ball I showed was using a small styrofoam ball while the bottom one was with a larger styrofoam ball. (inspiration photo from lonny).
~Megan
Visit my sidebar to see what parties this will be linked to!


Comments
I haven't been by in a couple weeks, you have been a busy girl! Love the topiary ball! I have been wanting some...homemade is even better! Hope you are enjoying the cooler weather. Windermere finally started to cool off...for now.
Best wishes,
Tammy