DIY: Framed Agate Art
I've slowly been working on our master bedroom, like at a snail's pace kind of slow. We finally got nightstands about a year ago that I love although I still need to repaint the hardware because the silver just doesn't go as well, probably black. And a few months ago I scored a duvet cover on clearance I've had my eye on, for how much you ask? Less than $30 for a king!! I actually had sent a friend/client to get one for her bedroom makeover and when she said there was 2 I had her pick one up for me as well. I was also able to score those coveted threshold lamps from Target's spring (or was it summer) line last year, on clearance as well... can we see a theme going on here? I'm cheap when I know I can get something on clearance for half or even a quarter of the price (yes the nightstands were on clearance too)!
Anyway, one thing we are majorly lacking in is art for the room. I hung these DIY mirrors soon after we moved in but that was about the end of it. I don't want too much stuff on top of the nightstand as we now have a little one on the run and ready to grab anything within reach, so it had to be something that could hang on the walls but still look a part of the nightstand vignette. Enter one of my latest favorite natural stones, the agate.
Here's what you'll need:
A frame in your choice size with a mat (this one is from Target under $13)
Nice paper (I used watercolor paper because I like the texture)
Your stones (mine are actually beads from Michaels and I don't think they are real agate, only look alike)
And some tape or tacky dots
First remove the back of your frame, clean the glass if you're OCD like me, and then play around with the stones (if you have more than one) to see what arrangement you like best. Keep the mat in the frame so you know your borders.
Once you have them how you like them, add a tacky dot to the the back of them (the side that is facing you when you are arranging them).
And last lay your paper down on top and press down on the stones so they stick well. You may want to add some dots to the corners of the paper so it doesn't shift in the frame. And put the frame backing back on.
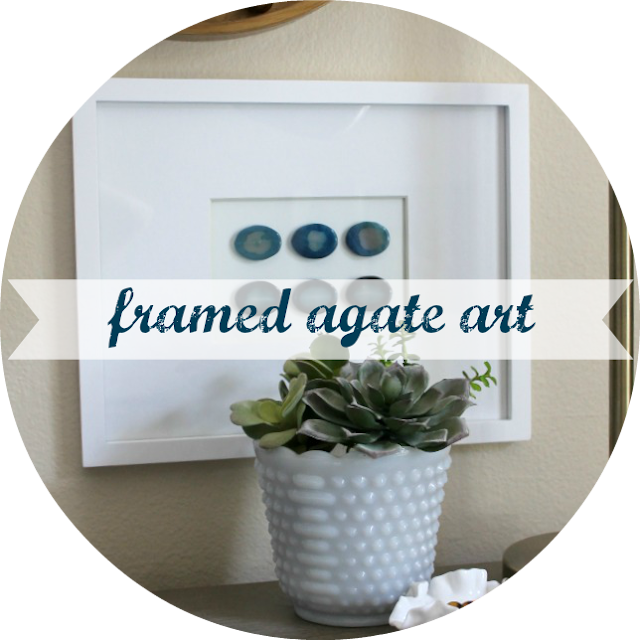
Your art should look like this when you're done. If you are using a single large agate stone, I would suggest using a square frame with it.
You also want to be conscience of how thick your mat is. The thicker the better as it will allow the stones to fit into the frame (and for the back to be placed back on).
I hung it on my side of the bed... just not too sure hubby would appreciate it like me! ;) Also I centered it with the nightstand instead of the mirror for a bit of contrast. The white frame also helps break up all of the brass I have going on in this area, and the blue of the stones works well with our bedding.
I also may have a slight obsession with hob nob milk glass!

All together this art cost me less than $20 to create and I think it totally makes this space!
Now to think about where I could add more of them in the house...
I have other ideas for art on the other side of the room, just need to make up my mind on which pieces I like best (post coming soon about it!)
-Meg
linking up here:
linking up here:


Comments